As people continue to shelter in place and grow bored with eating the same pantry staples over and over, we could all use a special meal with a bit of flash and pizzazz, am I right?
I have just the thing for you. It’s a meal where the cooking is as much fun as the eating, where the end result is an improvement on that thick, juicy steak you already love, and where you get the kick of playing with — wait for it — a blowtorch.
But before we get to the blowtorch, we need to talk about steak. Let’s say you like your steak medium-rare — that means you like the meat to have an internal temperature of about 140 degrees. But here’s the thing: That’s just the temperature as measured in the center of the steak. By the time the center has reached that degree of doneness, the top and bottom of the steak have been cooked way behond that point. So if the center turns out medium-rare, the top and bottom are usually medium-well. You can see that in most photos of sliced steak, which typically show a rosy pink center with gray edges. This is fairly unavoidable if you’re using any of the standard steak cooking methods: grilling, broiling, skillet-frying and so on.
Wouldn’t it be great if you could have a uniform rosy-pink doneness throughout the steak, not just in the center, while still maintaining that nicely charred exterior crust that we all love?
As it turns out, there are a couple of ways to achieve that. The most common one is sous vide, which involves sealing the meat in a plastic bag and then putting the bag in a circulating water bath at a controlled temperature. If you set the water to be at 140 degrees, then the steak will eventually reach that temperature — throughout the meat, not just in the center — and literally cannot overcook, even if you leave it in the water for hours. Then you can remove it from the bag, give it a quick skillet sear on both sides to create a crust, and you’re good to go.
But sous vide has some drawbacks. First, you need a gadget to keep the water circulating and at a constant temperature, and those gadgets tend to be fairly pricey. Second, the process is time-consuming: for a thick steak, you’re looking at close to two hours of cooking time. Third, when you do the skillet sear at the end, you inevitably end up with a bit of a gray ring of overcooked meat at the edges — not as much as you’d get with grilling or broiling, but it’s still a bit frustrating, given that the whole point of sous vide is to avoid that. (You could avoid it entirely by skipping the finishing sear, but then your steak wouldn’t have any sort of char or crust, and who wants that?)
But the biggest issue with sous vide-ing a steak, at least for me, is that there’s something really unsatisfying about the process. Maybe it’s just my inner caveman, but putting a nice hunk of meat in a plastic bag and essentially poaching it does not scratch my carnivore itch, no matter how nicely the resulting steak turns out. If I’m hankering for beef, I don’t instinctively think of the intersection of meat, plastic and warm water; I think of the intersection of meat and fire.
And that’s where the blowtorch comes in. Instead of taking the sous-vide approach of cooking the meat evenly and then searing the top and bottom, we’re going to reverse that process by freezing the meat, torching the top and bottom to create a nicely browned crust, and then slow-cooking the steak to a perfectly uniform doneness. It’s easy, it’s delicious and have I mentioned that you get to play with a blowtorch?
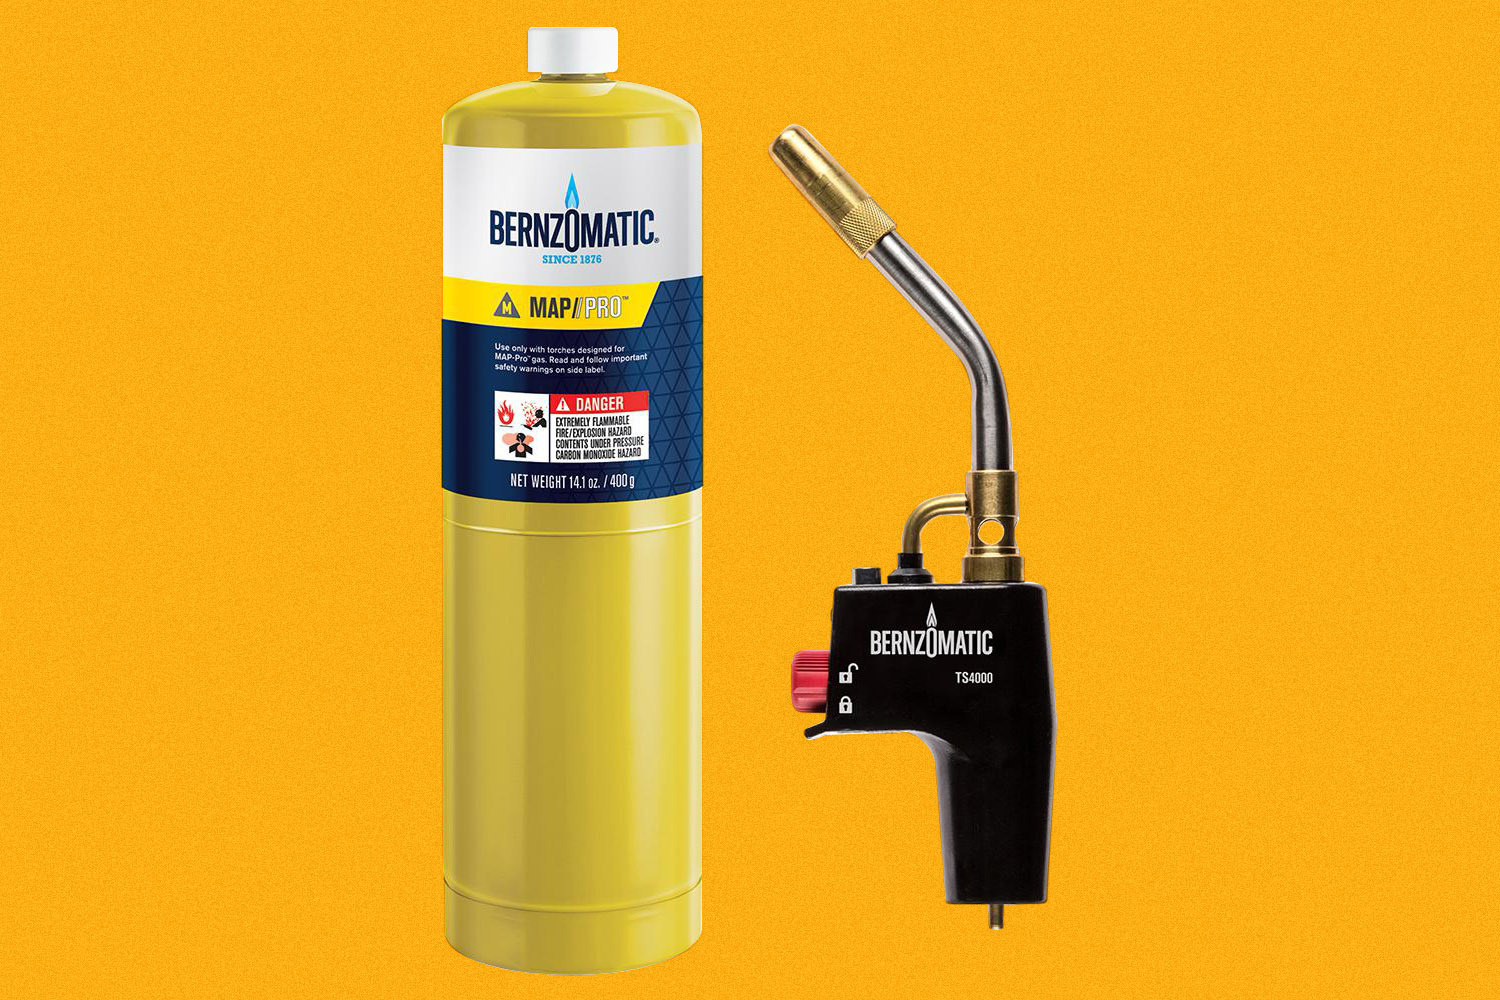
But not just any blowtorch — if you already have one of those little kitchen torches that pastry chefs use to put the crust on a crème brûlée, that’s not going to cut it. You want something more industrial-grade — something sold at the hardware store, not Williams-Sonoma. Look for one with push-button activation, instead of the kind you have to light with a spark. Personally, I use a Bernzomatic TS4000, which connects to a standard propane canister.
Once you have your torch, you’ll want some good steak. For this article, I got myself a boneless ribeye and a bone-in New York strip from Fleishers Craft Butchery in Brooklyn. Both weighed about a pound and were one and three-quarter inches thick. (Thicker is definitely better for the blowtorch method, since it accentuates the remarkable consistency of the doneness in the finished product.)
Once you have your steak, wrap it thoroughly in a few layers of plastic wrap, put it in a zip-lock bag with all the air pushed out of it, and then pop it in the freezer for at least six hours (or, ideally, overnight). It may seem counterintuitive to freeze fresh, good-quality meat, but meat actually freezes quite well with no appreciable loss in quality or flavor. As long as you wrap and bag it well, a high-end steak will be fine in your freezer for months.
Once you’re ready to cook, find a well-ventilated spot in your kitchen where you’ll be comfortable wielding a blowtorch without feeling cramped or constricted. Then remove any pets or young children and proceed like so:
- Preheat your oven to its lowest possible temperature — 200 degrees, or 180, or as low as it will go.
- Put your frozen meat on a rimmed baking sheet, a baking dish, or an ovenproof skillet.
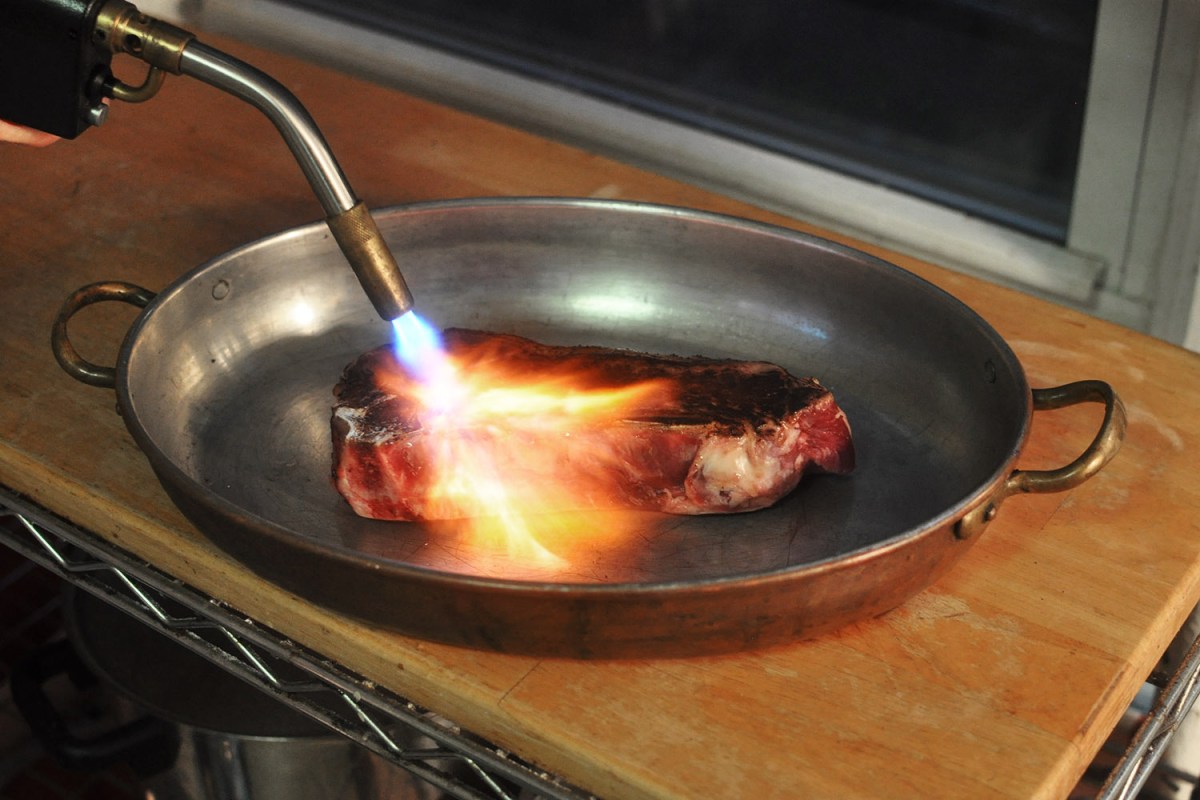
- Turn on your blowtorch and apply the flame to the meat, keeping the torch’s nozzle about two to three inches from the meat’s surface and moving slowly as you go to avoid scorching any one spot. The meat will remain frozen, but its exterior will start to look like it’s been browned and seared. The flame may flare up a bit when it hits fat (a particular issue with ribeyes, which have two large veins of fat running through them), but don’t be alarmed by that — just keep the torch moving and you’ll be fine.
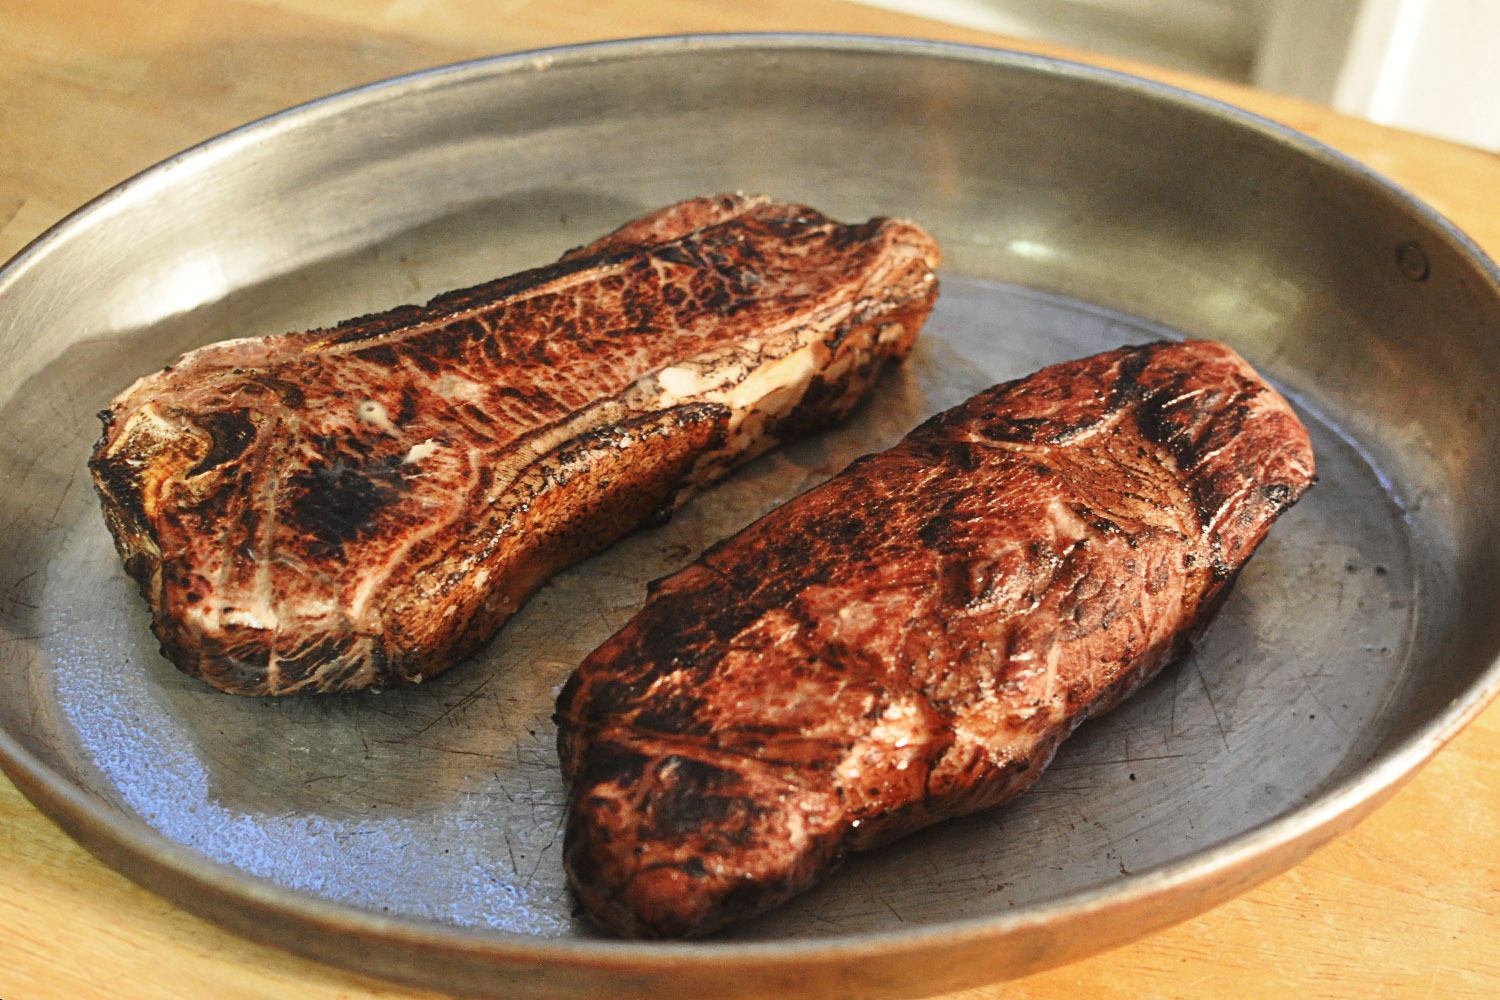
- Keep torching, going back over any spots you’ve missed, until you’ve browned the entire top surface. Use tongs to turn the meat over and repeat the process on the other side. Then use tongs to stand the meat on its side and torch all around the edges (again, be prepared for fat flare-ups). When you’re done, your kitchen will smell really good and your steak will look like it’s ready to eat, even though it will still be frozen. At this point, all you’ve cooked is the exterior.
- Put the baking sheet or skillet in the preheated oven. After 45 minutes, use a meat thermometer to check the internal temperature. At this point it will likely be around 90 or 100 degrees — not yet ready eat, but high enough to let you know that everything’s proceeding apace. After that, keep checking it every five to 10 minutes. For medium-rare, you’re looking for about 125.
- Remove the meat from the oven and let it rest for 10 minutes. Its temperature should continue to climb during this period. Then slice and enjoy.
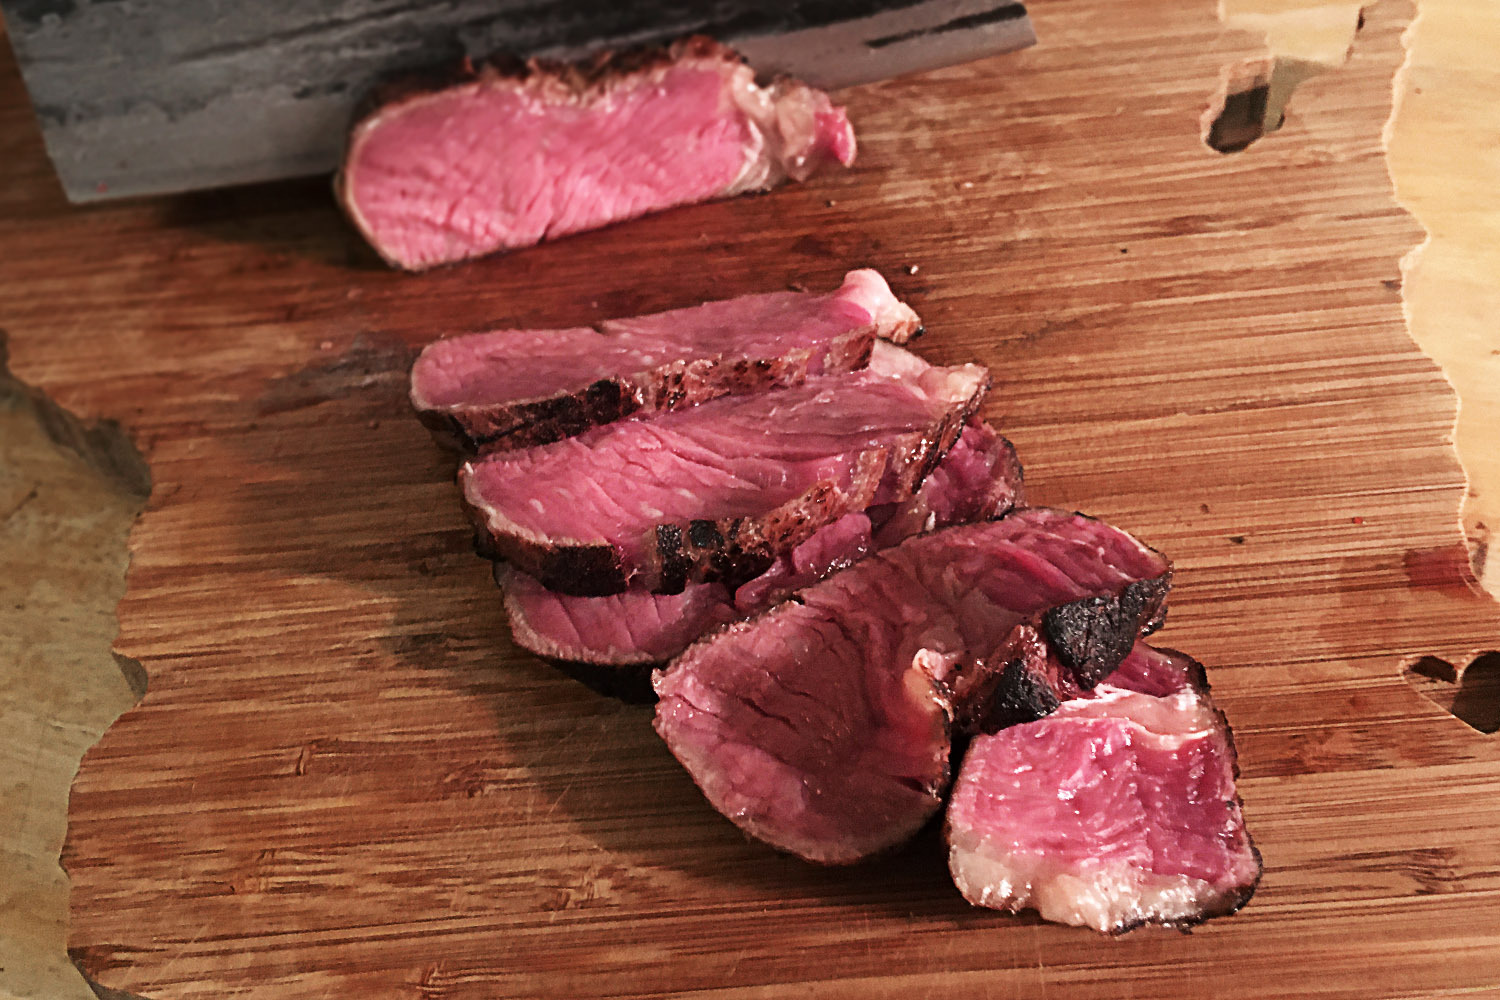
When you cut into the steak, you’ll find that it has a uniform doneness from top to bottom. No gray ring, no overcooked-to-pink gradient — just a perfect medium-rare from top to bottom, with the blowtorched crust on the exterior. Congratulations — you’ve just made the perfect steak!
One thing to be aware of: Seeing that full cross-section of medium-rare pink may lead you to think that the steak is undercooked. But that’s because you’re used to seeing the surrounding gray areas. Don’t be fooled — although it may seem more red than usual, what you’re seeing there is medium-rare, a true medium rare. (If your meat thermometer indicates that it’s not cooked as much as you like, you can always put it back in the oven.)
If there’s a drawback to the blowtorch method, it’s that the low oven plus the 10-minute resting time will leave you with a steak that isn’t sizzling hot, and it will cool off a bit more while you’re eating. One way to counter this is via the old steakhouse trick of heating up your dinner plates in the oven, which you can do while the steak is taking that 10-minute rest. You can even add some butter to the heated plates as you serve to create a bit of sizzle. Just be careful when handling the hot plates.
As you can see from the pictures accompanying this article, the blowtorch method also makes gives you a chance to take some really cool-looking photos for all your friends to admire and be envious of on social media. That’s just one more way that the blowtorch approach blows sous vide — or whatever other method you currently employ — out of the water.
Join America's Fastest Growing Spirits Newsletter THE SPILL. Unlock all the reviews, recipes and revelry — and get 15% off award-winning La Tierra de Acre Mezcal.
